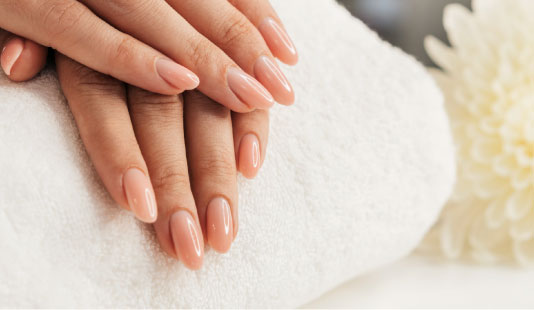
Glazed Donut Nails: Glazed nail effect
Find out how to achieve the Glazed Donut Nails effect at home. We are going to tell you about the techniques and products to flaunt this trending shiny manicure in style.

WHAT ARE GLAZED DONUT NAILS AND WHY ARE THEY TRENDING?
This is one of the viral trends in recent years, whereby we can show off our sparkly manicure in style making our nails shine more than a Coachella outfit.
This type of manicure went viral after Hailey Bieber showed it on her social media and at different events wearing this nail style, which imitates the shiny glazing on donuts.
HOW TO GET THE GLAZED NAILS EFFECT?
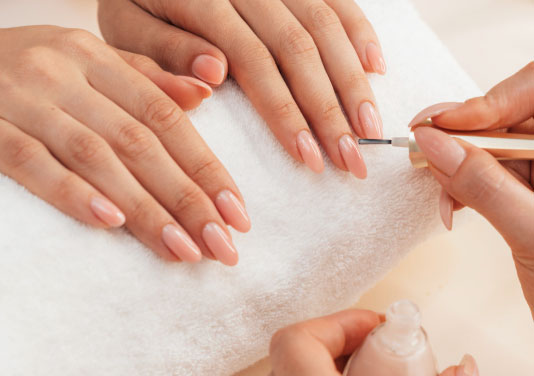
To achieve the classic glazed nails effect, the most recommended nail varnishes are those in translucent or pale shades. Bolder people may also combine it with French nails and even striking coloured varnishes.
One of the main hallmarks of this effect is the almond shape given to our nails, which, along with the shine, confer a stylish look to your hands.
HOW TO DO GLAZED DONUT NAILS STEP-BY-STEP
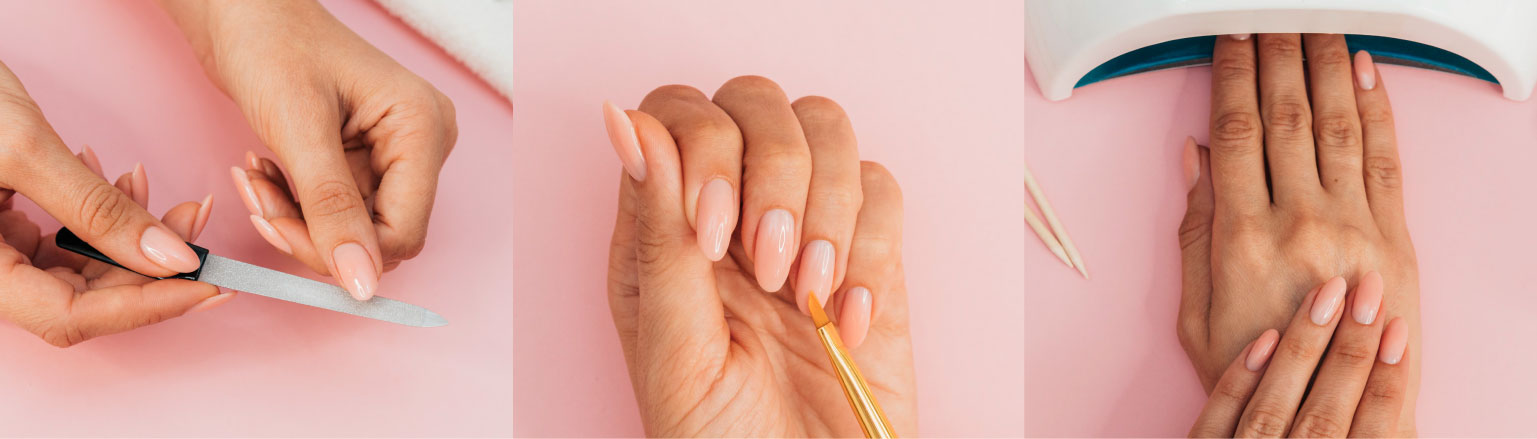
PREPARE YOUR NAILS
Remove any previous nail varnish using nail varnish remover and a cuticle trimmer.
Shape your nails using a sapphire nail file which is ideal for this purpose because of its extra strength.
Finish off using a fine-grain file to achieve a smooth surface on which to apply the nail varnish as uniformly as possible.
START YOUR GLAZED DONUT NAILS MANICURE
Apply a uniform layer of transparent varnish or nude effect varnish and allow it to dry.
Sprinkle a layer of powdered glitter over your nails using an applicator. Be careful not to put too much on in order to avoid a lot of glitter building up in the area around your cuticles, as it is usually very hard to remove.
It’s now time for the last step! Seal your nails with a top coat to protect the glitter you just applied and to make sure the look lasts longer.
What do you think about?
Share comments, opinions and tricks with the Community